Share
How to Create a Blockchain Token: Step by Step Guide

- BLOG
- Blockchain
- October 16, 2025
Tokens are the currency of the cryptocurrency world. Blockchains, smart contracts, dApps, or wallets are the infrastructure built to support and use these tokens. Learning how to create a blockchain token isn’t just about writing code. It also involves understanding the economic principles that will govern your decentralized network.
Now, you have two options: take on the process and build the token yourself, or partner with our expert team of blockchain developers to bring your vision to life.
In the following sections, we’ll walk you through the full process of creating a blockchain token step by step.
Contents
- 1 What Is a Blockchain Token?
- 2 Types of Blockchain Tokens You Can Create
- 3 Different Blockchain Platform to Create a Token
- 4 Launch Your BEP-20 Token Today!
- 5 Tools You Need to Create a Blockchain Token
- 6 Step-by-Step Guide: How to Create a Blockchain Token
- 6.1 Step 1: Define the Token’s Purpose
- 6.2 Step 2: Choose the Right Blockchain
- 6.3 Step 3: Select the Token Standard
- 6.4 Step 4: Choose a Token Name, Symbol & Supply
- 6.5 Step 5: Write the Smart Contract
- 6.6 Step 6: Test the Contract
- 6.7 Step 7: Deploy to Mainnet
- 6.8 Step 8: Verify the Smart Contract
- 6.9 Step 9: Add Token to Wallets
- 6.10 Step 10: (Optional) Launch on DEX or Platform
- 6.11 Step 11: Build Community & Utilities
- 7 Common Mistakes to Avoid When Creating a Token
- 8 Why Create a Blockchain Token?
- 9 Security Tips for Your Blockchain Token
- 10 Why Should You Choose Webisoft for Blockchain Token Development?
- 11 In Closing
- 12 Frequently Asked Questions
What Is a Blockchain Token?
A blockchain token is a digital asset created and managed on a blockchain network. Take it as a special kind of digital certificate that represents something of value.
And this could be anything from money, ownership rights, or even access to a service. Unlike traditional assets, blockchain tokens can be securely sent directly between people without needing banks or other middlemen.
Key points to understand:
- Tokens are created and stored on a blockchain.
- They can represent digital items or real-world assets like property or currency.
- Smart contracts control how tokens work and interact.
- Tokens can be transferred safely between users.
- They serve many purposes, including payments, voting rights, or access to services.
Types of Blockchain Tokens You Can Create
Before you create your own token, it’s important to understand the types. This part will help you choose the right kind of token based on what you want it to do.
- Utility Tokens: These tokens give users access to a product or service inside a blockchain project. For example, you might use a utility token to pay for features in an app or join special events on a platform.
- Security Tokens: Security tokens represent real ownership, like shares in a company or rights to a property. These tokens are often regulated and can give holders benefits such as dividends or voting power.
- Governance Tokens: Governance tokens let holders participate in decision-making for a blockchain project. If you hold these tokens, you can vote on important issues like how funds are used or changes to the system.
- Stablecoins: Stablecoins are designed to keep their value steady, usually by being linked to a stable asset like the US dollar. This makes them useful for trading and payments without worrying about big price changes.
- Non-Fungible Tokens (NFTs): NFTs are unique tokens representing one-of-a-kind items, such as digital art or collectibles. Unlike other tokens, each NFT is different and cannot be exchanged one-for-one. So, when you say NFTs are non-fungible, you’re saying they can’t be swapped one-for-one like regular tokens, because each one is distinct.
- Payment Tokens: Payment tokens work like digital money. They are used mainly to buy goods or services and to send value between people, similar to cryptocurrencies like Bitcoin.
Different Blockchain Platform to Create a Token
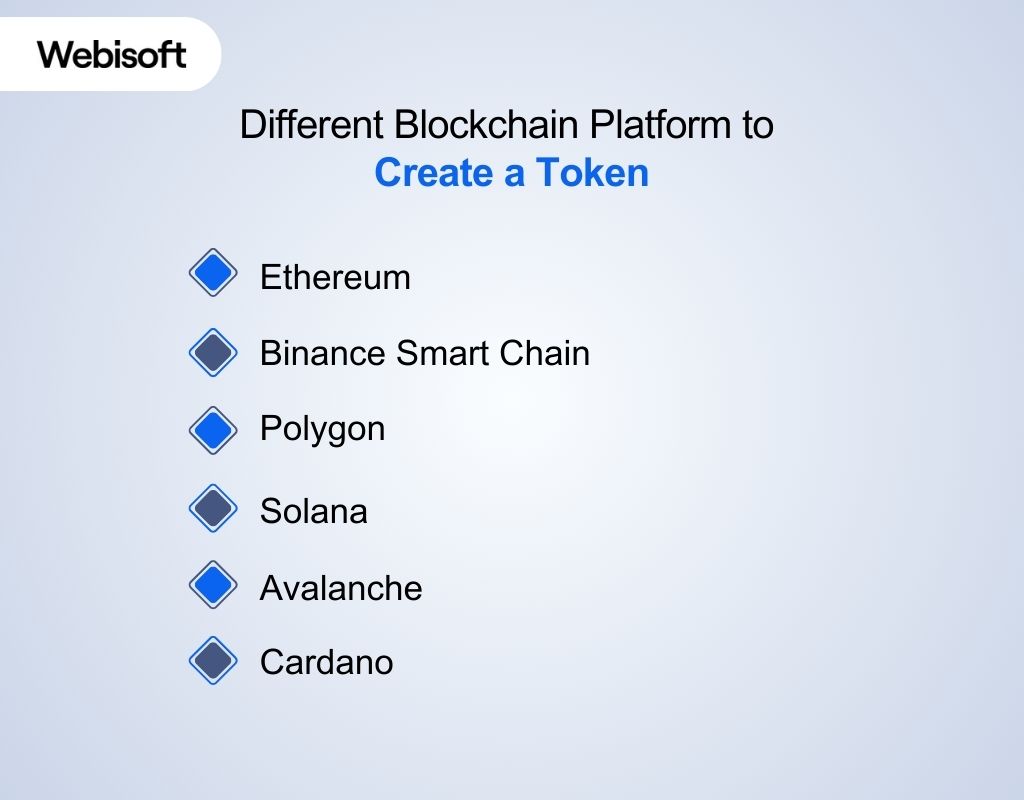
Not all blockchains are the same. Some are faster, some are cheaper. This part explains various platforms and shows you how to create a blockchain token on the platform that suits your needs best.
Ethereum
Ethereum is the most popular platform for creating tokens. It supports the ERC-20 token standard and has a large developer community and many tools. However, transaction fees (gas fees) can be high during busy times.
Binance Smart Chain (BSC)
BSC offers faster transactions and lower fees compared to Ethereum. It uses the BEP-20 token standard, which is similar to ERC-20, making it easy for developers to switch between the two.


Launch Your BEP-20 Token Today!
Book a free call with our blockchain experts — fast, secure, and hassle-free.
Polygon (Matic)
Polygon is a layer-2 solution built on Ethereum that offers faster and cheaper transactions. It’s popular for projects wanting to stay connected to Ethereum but avoid high fees.
Solana
Solana is known for its very high speed and low transaction costs. It uses a different token standard and is growing quickly for decentralized apps and tokens.
Avalanche
Avalanche provides fast, low-cost transactions and supports Ethereum-compatible smart contracts. It’s becoming popular for DeFi (Decentralized Finance) projects.
Cardano
Cardano focuses on security and scalability with a research-driven approach. It supports native tokens but has a smaller developer community compared to Ethereum or BSC.
Tools You Need to Create a Blockchain Token
To build a token, you need the right setup like a wallet, code editor, and smart contract tools. This part will show you what tools you need and how they help you develop blockchain token smoothly.
| Tool | Purpose | Key Features / Benefits |
| Solidity | Programming language for writing smart contracts | Widely used, supports complex logic, and standard for Ethereum tokens. |
| Remix IDE | Online code editor and testing environment | Browser-based, no installation needed, supports real-time testing and debugging. |
| OpenZeppelin | Library of pre-built smart contract templates | Provides audited, secure, reusable code to reduce bugs and speed development. |
| Hardhat | Development environment for Ethereum smart contracts | Offers advanced automation, testing frameworks, and plugin support. |
| MetaMask | Crypto wallet and browser extension | User-friendly interface to manage crypto assets and interact with dApps. |
| Testnets (e.g., Goerli, Mumbai) | Blockchain networks for testing smart contracts | Simulate real blockchain conditions with zero cost to test contracts safely. |
| Etherscan/BscScan | Blockchain explorers | Publicly displays contract info, transaction history, and enables contract verification. |
Step-by-Step Guide: How to Create a Blockchain Token
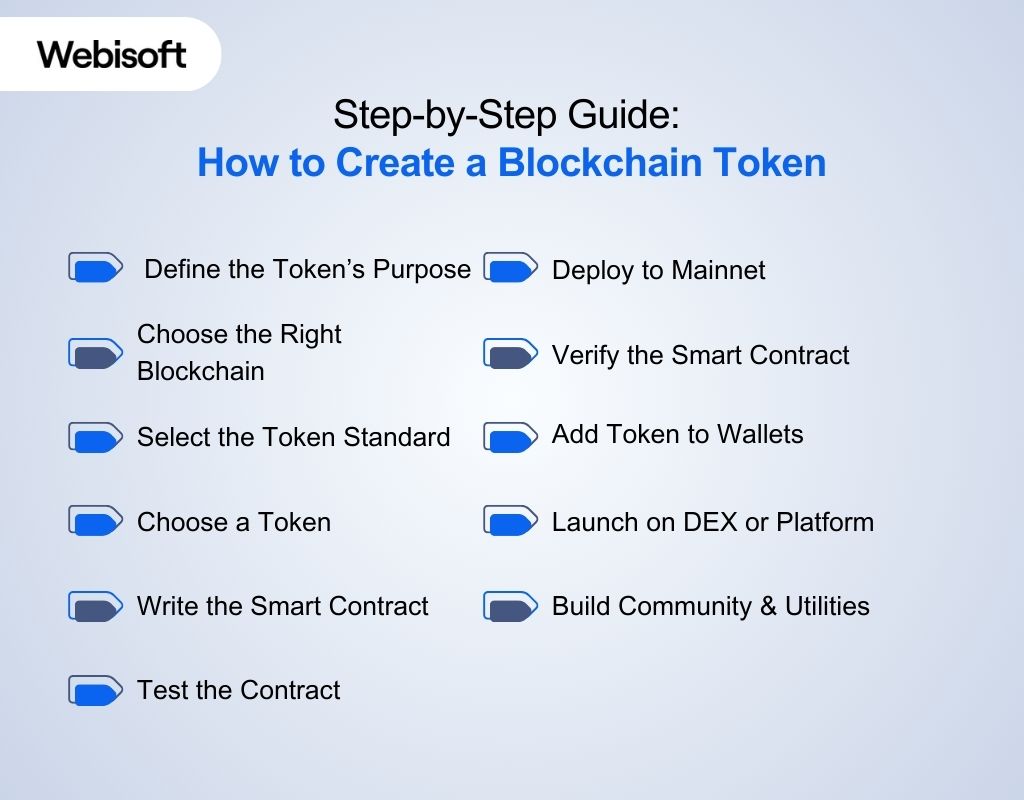
This section gives you clear steps on how to build a blockchain token, from writing the token code to deploying it on a blockchain. Perfect if you’re ready to take action but need guidance.
Step 1: Define the Token’s Purpose
Before writing any code, it’s important to understand why you’re creating the token. You’ve already seen the basics at the beginning of this article.
Every token should solve a specific problem or serve a clear function whether it’s for rewards, voting, trading, or access to services.
This purpose will guide all your other decisions, such as which blockchain to use and what features to include.
Importantly, without a defined purpose, your token may lack direction, usefulness, or value.
Questions to ask yourself:
- Is this token for utility (used inside an app or platform)?
- Is it a governance token (used for voting on decisions)?
- Is it meant to raise funds (e.g., for a project or startup)?
Step 2: Choose the Right Blockchain
Each blockchain has its own strengths, costs, and communities. For example, Ethereum is popular and well-supported, but there are cheaper and faster alternatives like BNB Chain, Polygon, or Solana. Ultimately, the right chain should align with your token’s purpose and your budget.
So what to consider while choosing the right blockchain:
- Transaction fees (gas): Ethereum is expensive; others are cheaper.
- Speed and scalability: Some blockchains process more transactions per second.
- Ecosystem support: Some blockchains have larger communities or tools available.
Well, once you choose a blockchain, you can select a compatible token standard.
Step 3: Select the Token Standard
A token standard is a technical blueprint for how your token behaves. For example, on Ethereum, most tokens follow the ERC-20 (for fungible tokens) or ERC-721 (for NFTs) standards. This ensures wallets, exchanges, and apps can understand and interact with your token.
Here are some common standards:
- ERC-20: For fungible tokens (all units are the same).
- ERC-721 / ERC-1155: For NFTs and mixed assets.
- BEP-20: Binance’s version of ERC-20 for BNB Chain
Here is an important note: choosing the wrong standard could make your token incompatible with wallets or platforms.
However, the token standard defines what your smart contract must include and now it’s time to name the token and set the rules.
Step 4: Choose a Token Name, Symbol & Supply
Your token needs a name, a symbol (like BTC or ETH), and a total supply (how many tokens exist). This is like branding plus economics — you’re setting the identity and the monetary rules of your token.
You’ll also need to decide whether the supply is fixed forever or if more tokens can be added later through minting.
Key decisions you’ll need to make at this stage include:
- Token name: Choose something simple, meaningful, and related to your project or brand.
- Symbol: A short, recognizable code (e.g., “MYT”) that users will see in wallets and exchanges.
- Total supply: Will the token have a fixed maximum amount, or can new tokens be created in the future?
- Decimals: Defines how divisible your token is — 18 is standard for most ERC-20 tokens, meaning it can be split into very small units.
Now that you’ve defined the token structure, you can write the smart contract to bring it to life.
Step 5: Write the Smart Contract
This is the technical step where you write the code that defines how your token works based on the token standard you chose earlier.
This code, called a smart contract, sets the rules for everything such as how tokens are transferred, how balances are managed, how new tokens can be created (minting), and more.
Usually, this contract is written in Solidity, the most popular programming language for Ethereum and similar blockchains.
Key tools to help you write your smart contract:
- Solidity: The programming language used to create smart contracts on Ethereum and compatible blockchains.
- Remix IDE: A user-friendly, web-based code editor that lets you write, test, and debug smart contracts directly in your browser.
- OpenZeppelin: A trusted library offering pre-written, secure contract templates that you can reuse to avoid common mistakes.
A well-designed smart contract can drive your token’s success, but a poorly written one can lead to costly issues. At Webisoft, we specialize in building secure and efficient smart contracts that power your blockchain tokens with confidence and precision.
After writing your smart contract, the next crucial step is to test it thoroughly to make sure it works correctly and securely before you deploy it to the real blockchain.
Step 6: Test the Contract
Before you put your token live on the main blockchain (called the mainnet), it’s very important to test it in a safe environment first.
This way, you can check if everything works as expected without risking real money. Testnets like Goerli (for Ethereum) or Mumbai (for Polygon) let you run fake transactions using test tokens that have no real value.
What to test during this phase:
- Does your token transfer smoothly between accounts without errors?
- Can it mint new tokens or burn (destroy) tokens if those features are included?
- Are permissions correctly enforced, such as special functions only the owner can use?
Useful tools for testing:
- Remix or Hardhat: These tools help you write and run tests to simulate how your contract behaves.
- Testnet wallets and faucets: Wallets like MetaMask connected to a testnet can receive free test tokens from faucets to perform transactions during testing.
Once your contract passes all tests successfully, you can confidently move on to deploying your token on the mainnet.
Step 7: Deploy to Mainnet
This step makes your token live on the real blockchain where anyone can use it. To do this, you will connect your cryptocurrency wallet and use tools like Remix or Hardhat to upload (deploy) your smart contract.
Keep in mind, deploying costs real cryptocurrency (like ETH on Ethereum or BNB on Binance Smart Chain) because you must pay gas fees to miners or validators who process your transaction.
Steps involved in deployment:
- Connect your wallet, such as MetaMask, to the deployment tool.
- Compile your smart contract code to prepare it for deployment.
- Use Remix, Hardhat, or another platform to send your contract to the blockchain network.
- Pay the necessary gas fees to confirm and complete the deployment.
Once your token is live, the next step is to verify your smart contract on a blockchain explorer so others can view and trust your code.
Step 8: Verify the Smart Contract
Verification means publishing your smart contract’s source code on a blockchain explorer like Etherscan (for Ethereum) or BscScan (for Binance Smart Chain).
This step helps build trust by allowing anyone to see exactly how your token works. Verified contracts also enable extra features in wallets and decentralized exchanges (DEXs), making your token easier to use and trade.
How to verify your contract:
- Visit the blockchain explorer website (Etherscan, BscScan, etc.).
- Enter your token’s contract address and upload your smart contract’s source code.
- Make sure you select the same compiler version and settings used when you deployed the contract. This ensures the code matches perfectly.
Once verified, users can add your token to their wallets easily and trust that the token works as described.
Step 9: Add Token to Wallets
To start using your token, you and your users need to manually add it to crypto wallets like MetaMask. This step doesn’t happen automatically because wallets need the exact token details to display and track it properly.
You’ll need to share these important details so everyone can add your token and see their balances.
Information users need to add your token:
- Contract address: The unique address of your token’s smart contract on the blockchain.
- Token symbol: The short code representing your token (like “MYT”).
- Decimals: How divisible the token is, usually 18 for most tokens.
After users can access your token in their wallets, you might want to list it on an exchange or platform to allow easy trading and broader use.
Step 10: (Optional) Launch on DEX or Platform
If you want your token to be traded publicly, you can launch it on a decentralized exchange (DEX) like Uniswap (for Ethereum) or PancakeSwap (for Binance Smart Chain).
To do this, you create a liquidity pool where your token is paired with a popular token (such as ETH or USDT). This allows users to buy and sell your token freely.
Steps to launch your token on a DEX:
- Connect your wallet to the DEX platform.
- Create a trading pair by pairing your token with another token (like ETH or USDT).
- Add an initial amount of tokens and the paired token to provide liquidity for trading.
Once your token is live on exchanges, the next important step is to build a strong community and create useful utilities to support and grow your token’s ecosystem.
Step 11: Build Community & Utilities
A token cannot succeed without people actively using and supporting it. Now that your token is live, your next focus should be on building a strong community around it.
This involves educating people about your token, offering incentives, and creating useful applications or services that give your token real value. A loyal and engaged user base is key to keeping your token valuable and relevant over time.
Ways to grow your community:
- Build a professional website and maintain active social media channels to share updates and engage users.
- Organize airdrops, giveaways, or staking rewards to encourage people to hold and use your token.
- Partner with apps, platforms, or games that can integrate your token as a payment method or reward.
You’ve moved from an idea to creating a real token. Now, by connecting with people and giving your token purpose, you ensure its ongoing success and growth.
Common Mistakes to Avoid When Creating a Token
Avoiding mistakes is important when learning how to create a blockchain token. Many beginners rush and make small mistakes that cause big problems.
In Q1 2025 alone, over 1.8 million tokens collapsed because of poor planning and rushed development. Here, you’ll learn what to avoid while learning how to make your own crypto token, so your launch is safe and successful.
- Not Defining a Clear Purpose: Creating a token without a specific use or goal can lead to confusion and lack of interest.
- Choosing the Wrong Blockchain Platform: Picking a blockchain without considering fees, speed, or user base can cause problems later.
- Ignoring Security Best Practices: Writing or deploying smart contracts without proper security checks can lead to hacks or token loss.
- Skipping Testing on Testnets: Deploying directly to the mainnet without thorough testing increases the risk of costly errors.
- Setting Unlimited or Poorly Managed Token Supply: Having no control over token minting or supply can cause inflation and loss of value.
- Not Verifying the Smart Contract on Explorers: Failing to verify the contract reduces user trust and limits wallet or exchange integrations.
- Neglecting to Add the Token to Wallets: If users can’t see the token in their wallets, they can’t use or trade it easily.
- Launching Without Building a Community: Tokens without active users or real utility tend to fail quickly.
- Ignoring Legal and Regulatory Issues: Not understanding the legal requirements for tokens can cause serious problems.
- Poor Documentation and Communication: Not providing clear information about the token and project leads to user confusion and mistrust.
Consult with us to learn how to avoid these mistakes. It will save you more time and money than you think.
Why Create a Blockchain Token?
Blockchain tokens open many opportunities, from building communities to raising funds. A Chainlink report says the market for tokenized assets could grow to $10 trillion by 2030.
This section explains why learning how to create a blockchain token is important for anyone wanting to launch their own digital project.
- Represent Assets Digitally: Tokens can symbolize ownership of physical or digital assets like real estate, art, or in-game items, making them easy to trade online.
- Enable Secure Transactions: Tokens use blockchain’s security to ensure safe and transparent transfers without needing banks or middlemen.
- Fundraising & Crowdsales: Tokens allow projects to raise money through Initial Coin Offerings (ICOs) or token sales, reaching a global audience quickly.
- Create Loyalty and Rewards Programs: Businesses can use tokens to reward customers with discounts, points, or special access, encouraging loyalty.
- Enable Decentralized Applications (dApps): Tokens are essential for running apps on blockchains, providing currency or access rights within these platforms.
- Increase Transparency and Trust: Blockchain tokens operate on open ledgers, letting anyone verify transactions and rules, which builds user trust.
Security Tips for Your Blockchain Token
Knowing how to protect your blockchain token is just as important as learning how to create a blockchain token in the first place. This section will share essential security tips to help you keep your token safe from hacks and attacks, ensuring your project stays trusted and strong.
- Use Audited Smart Contract Libraries: Start with trusted libraries like OpenZeppelin to reduce vulnerabilities in your code.
- Test Thoroughly on Testnets: Run extensive tests to catch bugs before deploying on the mainnet where mistakes can be costly.
- Limit Minting and Burning Rights: Control who can create or destroy tokens to prevent abuse or inflation.
- Implement Access Controls: Use owner-only or role-based permissions for sensitive contract functions.
- Avoid Hardcoding Sensitive Data: Don’t include private information or secret keys directly in your smart contract code.
- Stay Updated on Security Practices: Follow the latest guidelines and patches for smart contract security.
- Consider Professional Audits: Get your contract reviewed by security experts before launch.
- Use Multi-Signature Wallets for Administration: Require multiple approvals for important actions to reduce risk of compromise.
- Monitor Contract Activity Post-Deployment: Regularly watch transactions and unusual activities to respond quickly to threats.
Why Should You Choose Webisoft for Blockchain Token Development?
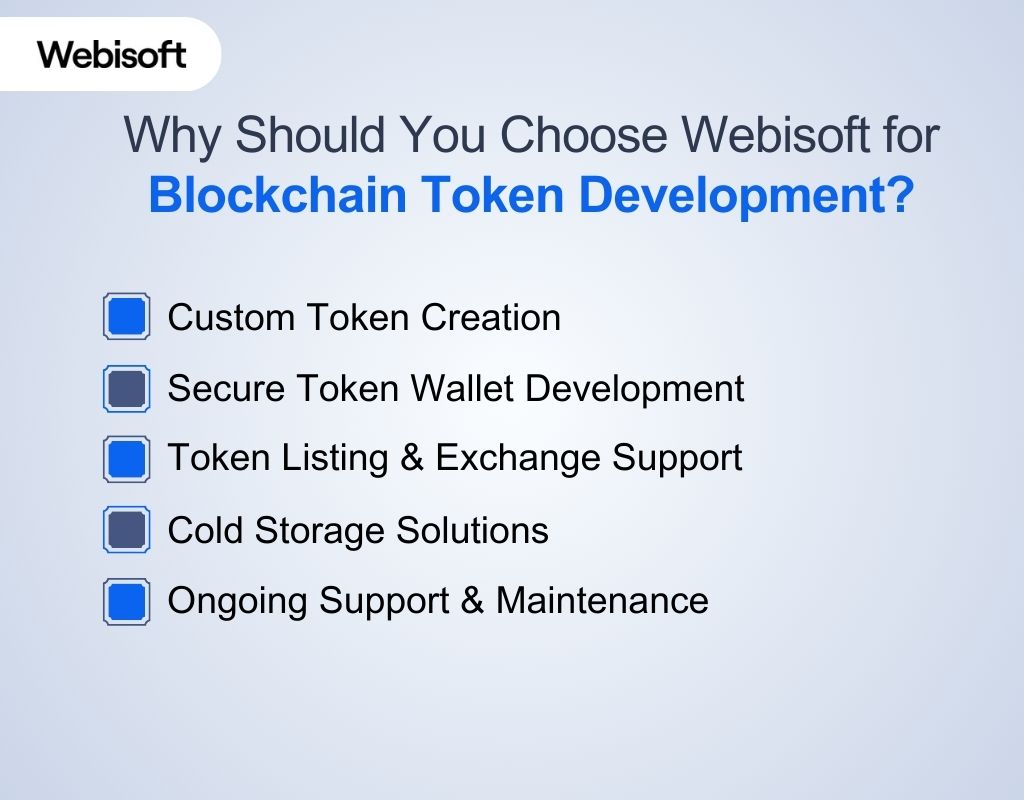
Webisoft is a trusted partner that helps businesses create powerful and reliable blockchain tokens. With strong experience in popular platforms like Stellar and Ethereum, Webisoft turns your ideas into secure and scalable digital tokens. Each token is carefully designed to match your specific business goals and help you succeed in the digital world.
What Webisoft Offers:
- Custom Token Creation: Webisoft creates tokens that clearly reflect your brand’s values and mission. We make sure your token fits your business purpose and works exactly as you need it to.
- Secure Token Wallet Development: We build safe and easy-to-use digital wallets where users can store, send, and receive tokens without worry. Security and convenience are our top priorities.
- Token Listing & Exchange Support: To help your token reach more users, Webisoft assists with listing your token on major exchanges and decentralized platforms. This increases your token’s visibility and allows people to trade it easily.
- Cold Storage Solutions: To protect your tokens from cyberattacks and hacking, we offer advanced cold storage options. These keep your digital assets safe by storing them offline.
- Ongoing Support & Maintenance: Our relationship doesn’t end after launch. Webisoft provides ongoing support and maintenance to ensure your token and its platform continue running smoothly and securely.
In Closing
Understanding how to create a blockchain token means knowing that every step from planning to deployment requires care and precision. A well-built token depends on clear goals, secure smart contracts, and the right blockchain platform.
This guide has laid out a simple, effective process to help you navigate these steps with confidence.
And if you want expert assistance or need help ensuring your token is secure and compliant, Webisoft is ready to support you throughout your journey. Together, we can make your blockchain token project a success.
Frequently Asked Questions
Do I need to code to create a token?
Yes, if you want full control and customization (using Solidity, Rust, etc.)
And no, if you use token generators like:
- OpenZeppelin Wizard
- TokenMint
- CoinTool
But even with tools, you need to understand what the code does.
What is a smart contract and why is it needed for a token?
A smart contract is self-executing code deployed on a blockchain. Your token’s rules, transfers, and permissions are enforced by this contract. For example:
- ERC-20 or BEP-20 tokens follow specific smart contract standards for compatibility.
What is the difference between ERC-20 and BEP-20 tokens?
- ERC-20: Token standard on Ethereum
- BEP-20: Token standard on BNB Chain, almost identical to ERC-20
They differ only in the network infrastructure, fees, and ecosystem.
Can I update or fix my token after it’s deployed?
Usually no, unless you designed it to be upgradeable using a proxy contract pattern (e.g., OpenZeppelin upgradeable contracts). Standard smart contracts are immutable once deployed, meaning their logic can’t be changed. That’s why testing thoroughly before deployment is critical.
