Share
How to Create a Solana Wallet: An Expert Guide

- BLOG
- Blockchain
- November 16, 2025
Learning how to create a Solana wallet is the first step if you want control over your crypto. A wallet is more than storage; it’s your way into the Solana ecosystem. You can send and receive SOL, track your tokens, and connect to apps without relying on exchanges.
Well, it might seem technical, but understanding the types, security options, and features makes it manageable. And once you get it set up properly, it opens doors to staking, DeFi, NFTs, and more. You don’t need to rush; clarity now saves mistakes later.
Contents
- 1 Why a Solana Wallet Matters
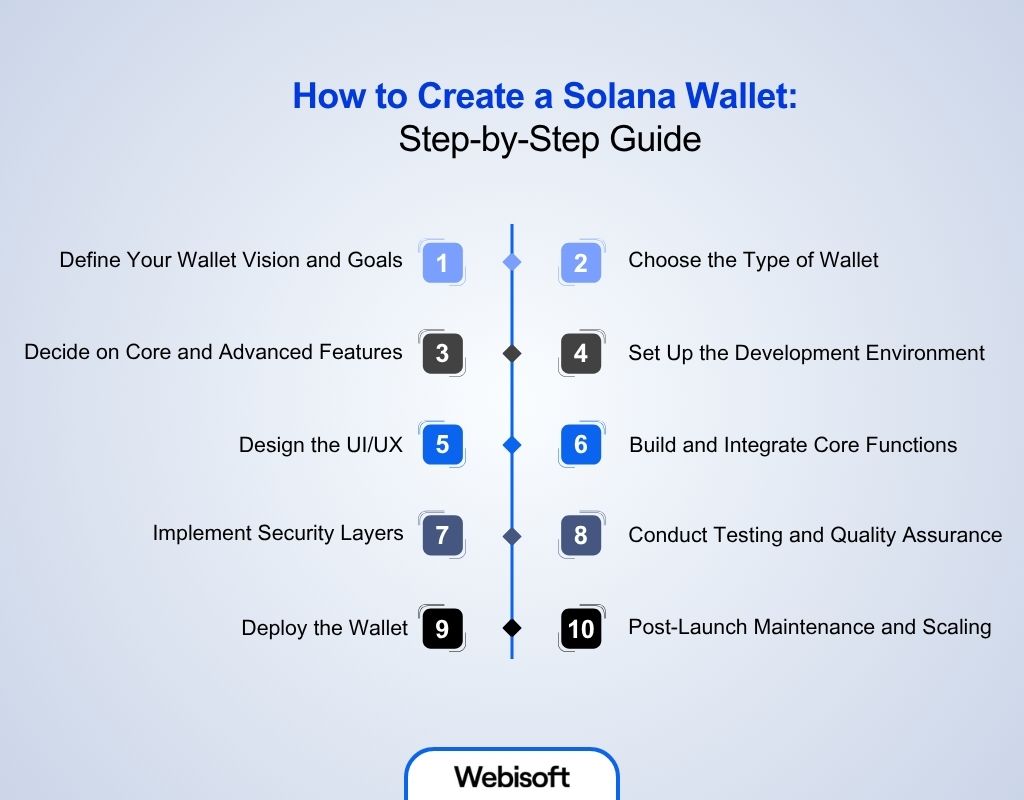
- 2 How to Create a Solana Wallet: Step-by-Step Guide
- 2.1 Step 1: Define Your Wallet Vision and Goals
- 2.2 Step 2: Choose the Type of Wallet
- 2.3 Step 3: Decide on Core and Advanced Features
- 2.4 Core Features to Include
- 2.5 Advanced Features to Add
- 2.6 Step 4: Set Up the Development Environment
- 2.7 Step 5: Design the UI/UX
- 2.8 Step 6: Build and Integrate Core Functions
- 2.9 Step 7: Implement Security Layers
- 2.10 Step 8: Conduct Testing and Quality Assurance
- 2.11 Step 9: Deploy the Wallet
- 2.12 Step 10: Post-Launch Maintenance and Scaling
- 3 Build a Secure, Scalable Solana Wallet with Webisoft
- 4 Start your Solana wallet development with Webisoft!
- 5 Conclusion
Why a Solana Wallet Matters
Creating a Solana crypto wallet gives you control over your assets. It is the basic tool to store, send, and receive SOL and other tokens. You can also interact with solana DApps safely. Here’s why you might want one:
- Ownership and Control: With a wallet, you own your private keys. That means no bank, exchange, or third party controls your funds. You can access your assets anytime and move them wherever you want.
- Access to DeFi and dApps: Many decentralized apps on Solana require a wallet to connect. Whether you want to stake SOL, trade tokens, or manage NFTs, a wallet is your gateway.
- Security: A properly set up wallet keeps your crypto safe. You can use hot wallets for convenience or cold wallets for stronger protection. Security features like encryption, 2FA, and multi-signature support help reduce risks.
- Portfolio Tracking: Wallets let you track all your assets in one place. You can see balances, transaction history, and performance without relying on exchanges.
- Participation in Solana Programs: If you want to stake, vote, or participate in token-based governance, you need a wallet. It allows you to interact directly with Solana’s blockchain protocols.
- Freedom and Flexibility: A wallet gives you independence from centralized exchanges. You can send tokens instantly, swap assets, and use them across different apps without restrictions.
For businesses and developers looking to build custom wallets or blockchain solutions, Webisoft provides secure, scalable, and fully customized development services.
In short, a Solana wallet for beginners is like a personal key to the blockchain. Without it, you cannot fully interact with Solana or control assets.
How to Create a Solana Wallet: Step-by-Step Guide
 Follow these steps to set up a Solana wallet, manage your crypto safely, and access tokens, NFTs, and DeFi apps with ease.
Step 1: Define Your Wallet Vision and Goals
Before writing a single line of code, pause for clarity. Ask yourself: what exactly do you want this wallet to do? That question isn’t philosophical. It’s technical. The way you answer it decides your entire structure later.
- If your goal is trading, you’ll focus on fast transactions and exchange integrations.
- If it’s for NFTs, you’ll need to support the Metaplex standard and image storage.
- A DeFi wallet? Then smart contract interaction and token swaps will dominate your backend logic.
You should also know who you’re building for.
- Regular users expect simple buttons and low learning curves.
- Developers want custom APIs.
- Investors care about analytics and portfolio tracking.
Each group changes how your interface behaves and how your code performs behind the scenes. Now, think about how this wallet sustains itself. Maybe it earns from small fees, premium subscriptions, or white-label deals. Your business logic will later blend into your smart contracts and API endpoints. And don’t skip studying others.
- Tools like Phantom, Solflare, or Glow already solved many of the same problems you’ll face.
- Look at their flow, security setup, and how they handle speed on Solana’s network.
You don’t need to copy, but knowing the standard helps you build something better. Having a defined goal keeps your code, UI, and testing consistent later. It’s the anchor that prevents your wallet from becoming just another app in the noise.
Step 2: Choose the Type of Wallet
Once the purpose is clear, you’ll need to decide the structure. Different types of wallets handle user keys and blockchain calls in different ways.
- A hot wallet lives online. It connects directly to Solana RPC nodes and signs transactions instantly. It’s great for frequent users but requires strong local encryption because it’s always exposed to the internet.
- A cold wallet stores keys offline. These usually work through hardware devices like Ledger or air-gapped systems. They interact less but offer maximum safety.
Here are their differences:
| Wallet Type | Private key | Key Strength | Best For | Notes |
| Hot Wallet | Online, connected to the internet | Quick access, convenience | Frequent users, traders | Needs strong local encryption because it is always exposed |
| Cold Wallet | Offline, usually hardware devices | Maximum security | Long-term storage, large holdings | Slower for transactions, less convenient for daily use |
Choosing the right type defines your architecture. It tells you what kind of database to use, what SDKs matter, and how your backend will connect with Solana clusters.
Step 3: Decide on Core and Advanced Features
This one is an important step of how to create a Solana wallet. Now you can start thinking in terms of functions. A wallet, at its simplest, is just a tool to generate keys, sign transactions, and interact with tokens.
Core Features to Include
- Create or import wallets using seed phrases or private keys
- Store SOL and SPL tokens
- Send and receive assets
- Show token balances and transaction history
- Connect to Solana dApps
- Manage local keypairs securely
- Handle transaction signing and confirmations
Advanced Features to Add
- SOL staking and delegation
- NFT viewing and metadata using Metaplex SDK
- Built-in token swaps
- Multi-account support under one seed phrase
- dApp permission controls and access revocation
- Real-time activity alerts
- Optional biometric login or 2FA for added device security
- Multi-device syncing through encrypted sessions
Each feature increases performance load, RPC usage, and backend pressure, so map them early. This helps you estimate cost, development time, and how your wallet will behave under real network conditions.
However, for a seamless and secure how to create a Solana wallet process, teams often rely on experts like Webisoft. They build scalable, feature-rich Solana DApps and blockchain solutions.
Step 4: Set Up the Development Environment
Now it’s time to get your hands dirty. Before anything else, set up a clean workspace.
- Install the Solana CLI. It’s your gateway for how to set up a Solana wallet, manage accounts, and connect to devnet or mainnet. You’ll also use it to generate keypairs, which act as wallets during development.
- Next comes Rust, the main programming language for Solana smart contracts (known as programs).
- If you want cleaner syntax and easier testing, use the Anchor Framework. It abstracts a lot of the complex steps and lets you focus on logic instead of boilerplate code.
- On the front end, Solana-Web3.js lets your app send transactions, check balances, or create a wallet on Solana blockchain programmatically by generating keypairs for signing.
- For local testing, run a local validator. This sandbox lets you simulate real blockchain conditions without losing actual SOL.
When you’re ready to build visuals, React, Next.js, or Flutter work great depending on your platform. And yes, stick with VS Code.
It handles Rust and JavaScript projects smoothly, especially with the right plugins like Rust Analyzer. For wallet connections on the UI, use Solana Wallet Adapter.
It supports Phantom, Solflare, and Ledger and simplifies secure integrations. Once this environment is ready, you’ll have all the moving parts to build and test in sync.
Step 5: Design the UI/UX
Even if the backend is flawless, bad design can ruin it. Users judge a wallet not by how secure it is but by how easy it feels to use.
- Start with a clear dashboard showing total balance and token list.
- Add fast Send and Receive buttons because they’re the heart of the experience.
- QR scanning simplifies transfers, so include that early. Keep onboarding clean and avoid long tutorials.
- NFT users love visuals, so display tokens in a gallery-style grid using metadata pulled from the blockchain. Give room for light and dark themes to personalize the look.
Figma or Adobe XD lets you model these flows before any coding. You’ll catch UX mistakes early and save weeks later. Good design doesn’t just look nice.
It reduces support requests and makes people trust your app faster. And yes, following this approach helps how to make a Solana wallet safely.
Step 6: Build and Integrate Core Functions
Once your environment and design are ready, it’s time to link them together. This is where your app begins to “live.”
- Start by generating keypairs through Solana-Web3.js or the Solana CLI. These keys act as identities for testing. For real users, integrate Solana Wallet Adapter so they can connect wallets like Phantom or Solflare directly from your UI.
- From here, build transaction handling. Let users enter recipient addresses, specify amounts, and confirm before signing. Always simulate transactions before sending, and use confirmation logic to verify when they finalize on-chain.
- Then move to token management. Support SOL and SPL tokens by fetching balances using getParsedTokenAccountsByOwner() from Web3.js.
If you’re adding NFT features, integrate Metaplex SDK to fetch metadata and display digital assets. Never store private keys in localStorage.
For testing wallets, you can encrypt and store them temporarily, but production wallets should depend on secure environments like browser extensions, hardware wallets, or mobile secure enclaves.
Never send private keys to a server. Add essential network support. Allow switching between devnet and mainnet and provide fallback RPCs to avoid dropped requests.
At this stage, your wallet is functional. It connects, signs, sends, and receives. You now have a working prototype ready for deeper testing.
Webisoft’s blockchain team can help implement these core functions efficiently, from SOL and SPL token management to NFT integrations with Metaplex SDK.
Step 7: Implement Security Layers
This part separates amateur wallets from professional ones. A single security gap can wipe user funds in seconds.
- Start with encryption. Use AES-256 only for temporary key storage. For production, rely on secure enclaves, browser extensions, or hardware wallets instead of storing private keys yourself. Avoid plain text at all costs.
- Add 2FA or biometric authentication for sensitive actions like signing or exporting a wallet.
- For enterprise-grade users, multi-signature support can add safety. Transactions only go through if multiple users approve.
- If you build custom programs, get them audited or use well-reviewed templates to avoid logic vulnerabilities.
- Enable phishing protection. Show clear transaction previews, verify domains, and let users manage or revoke dApp permissions.
- If you’re writing custom Solana programs, run a security audit or use open-source templates that have been reviewed publicly.
- Use trusted RPC providers with fallback endpoints. Always run traffic over HTTPS and secure any backend APIs.
- Add small UX safeguards: confirm sends, validate addresses, and block malformed or risky inputs. Security evolves continuously as your wallet grows.
Security isn’t a one-time task. It’s a mindset that follows every update and feature you release. With advanced encryption, multi-signature support, and secure authentication, Webisoft develops wallets that protect both users and assets.
Step 8: Conduct Testing and Quality Assurance
No matter how good the code looks, it must prove itself. Testing ensures your Solana wallet setup guide works properly under pressure.
- Start small with unit tests that check individual functions like wallet creation or token transfers.
- Then check end-to-end functionality to make sure all modules connect properly. Invite early testers. Their confusion often shows you where UX breaks.
- For security, do penetration testing or hire experts to simulate attacks.
- And finally, test performance. See how fast it loads, how it behaves on slow networks, and how it handles many transactions at once.
A wallet that passes these stages feels polished, predictable, and professional.
Step 9: Deploy the Wallet
Once everything runs smoothly, you can go live.
- Host your backend securely on platforms like AWS, GCP, or Azure.
- If it’s a mobile wallet, submit it to the Play Store or App Store after proper review.
- For web apps, deploy on a fast CDN or hosting provider.
- Set up monitoring tools to track performance and crash reports in real time.
Before public release, register your app and logo to protect your brand. Do one last audit to catch any missed security gaps. Launching is exciting, but remember, this is just version one.
Step 10: Post-Launch Maintenance and Scaling
After launch, your real work begins.
- Keep an eye on error logs and metrics.
- Push updates often to patch bugs or fix vulnerabilities.
- As Solana evolves, update your SDKs and dependencies.
Old libraries can break silently if ignored. Over time, you can add new abilities such as cross-chain swaps, multi-token staking, or analytics dashboards.
And as users grow, invest in customer support and compliance. Data privacy laws and crypto regulations change often, so stay aligned. A wallet that updates often feels alive. It keeps user trust and stands strong in a fast-changing blockchain world.
Build a Secure, Scalable Solana Wallet with Webisoft
Creating a Solana wallet often starts simple. You connect APIs, manage keys, and send a few test tokens. But when the goal shifts toward real users, the picture changes.
Security becomes a priority. Transactions need to stay fast. The wallet must feel light, clear, and safe. That’s where Webisoft steps in. Webisoft builds multi-chain wallets that work smoothly on Solana and other major networks.
They don’t just focus on features. Instead they focus on balance: performance, safety, and design. They think ahead, preparing systems that can handle real growth without breaking.
Here’s what usually defines a wallet built by Webisoft:
- Advanced encryption to protect every transaction and key.
- Cross-chain compatibility with networks like Solana, Ethereum, and BNB.
- DeFi and NFT integration for flexible, modern use cases.
- Clean UX that makes complex processes feel effortless.
You can think of it this way:
| Focus Area | What Webisoft Ensures |
| Security | Strong encryption and secure key storage |
| Performance | Fast transactions under heavy load |
| Scalability | Architecture ready for expansion |
| Usability | Smooth experience for both new and advanced users |
A good wallet isn’t only about writing code or deploying contracts. It’s about trust. It’s about how users feel when they open the app, send assets, or connect to a dApp.
That’s the mindset Webisoft works with creating reliable wallets that scale and stay secure even as the ecosystem grows.
If you’re ready to move beyond the basics and build something lasting, Webisoft can help turn that plan into a working, dependable Solana wallet.


Start your Solana wallet development with Webisoft!
Our team builds reliable Solana wallets with strong protection and simple interfaces. You get scalable, flexible solutions for real users.
Conclusion
Learning how to create a Solana wallet is straightforward once you follow the steps carefully. The right wallet lets you own your assets, track them easily, and use them safely across apps.
Security matters, but so does usability. When wallets are built well, you don’t have to worry about mistakes or slow systems.
Experts like Webisoft can help if you want extra features or scaling. At the end of the day, a wallet is your key to the Solana blockchain. It’s not just about holding tokens, it’s about being in control.
